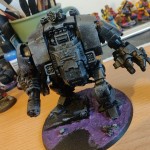
Great success! After locking down the design for the bases on the Terminator Sergeant, the remaining 9 models were based in under an hour. This is the same approach I took when I sat down to paint. Start by selecting one model from the squad you want to complete and use this model as a prototype for trying out various painting/design schemes until you’ve locked one down. Once you have the ‘example’ model looking good, go right down the line, repeating each step with the remaining models in the squad before moving onto the next step. I know this sounds straightforward and simple but it works. And honestly, if I don’t make a concerted effort to paint in this manner, I get distracted easily and want to work on something else. This approach will save you time because you’ll have the same paint/materials ready to go for the same step on each model; you’re already familiar with performing the same actions for that step, so repeating the step should make you faster and more accurate; lastly, it takes the guess work out of what to work on when you do get some time to work on your hobby -- otherwise I’ll stare at my collection and be distracted by the “cooler” looking models or be completely daunted by all the remaining painting/assembly that stands in the way of me having a fully painted army on the tabletop. If animals/small children allow, having a designated area for this is ideal so you don’t have to pack everything away and set it all back up again to paint. This was key for me as I rarely get a long stretch of time to sit and work on painting. Instead, I can sit down whenever I get a few minutes of down time and jump right into the step I was working on.
This was my prototype for the squad (you can see from the background model the first step of my assembly-line process: a layer of *foundation paint, astronomican grey, over all parts that will end up white or with a lighter color):
*Before I heard about warhammer, I was into building model airplanes and painted them using Testor's paints, which I also used on my very first models (this paint needed thinner and can clump out the detail more than lighter, water based paints). Eventually, when I could afford them, I started buying some of Games Workshop's recommended line for painting miniatures. Citadel's Foundation paints are some of the best I've used and will save you a good deal of time during the painting process as the pigmentation of the color seems much richer/thicker which cuts down on the number of coats necessary to achieve the desired color.
After the grey foundation paint was dry I went back over those parts with skull white, followed by the blood red on the shield and eyes:
Next came boltgun metal for the gun, powerfist, and various metallic parts on the model followed by bronze for the ammunition:
Once I had the primary colors on each of the models, all that was left was the bases and fine detail work:
I decided to use Khemri Brown foundation paint with some of Citadel’s dead grass for the bases:
Once I had the bases complete, I went back over for a quick touch up to correct any glaring mistakes. I still have more detail work I can do to make the models even better, such as purity seals, more highlights on the armor, etc. But I’m pretty happy with the state of this first squad - you can view more pictures here. I may go back at a later time once my skills are a bit more honed.
This is the first full squad I’ve managed to fully paint in quite some time. I was pretty rusty with the brush but the concepts/techniques came back fairly quickly. Looking back over the last few weeks I’ve been working on this squad, the two biggest things that helped me “complete” them was a) having the right materials; and b) taking an assembly-line approach to painting. With this squad finished, I can now check off my first feature project goal for this blog as well as first completed squad of 2011!
Here’s hoping 2011 is a good year for all!


.png)


.jpg)


No comments:
Post a Comment