Pages

Chaplain on Bike

Sunday, January 30, 2011

I'm just about finished re-painting this Chaplain on Bike. It was originally painted by a friend to go with his Dark Angels army back in the day, so there weren't too many steps involved to make this into a Raven Guard HQ option.


You can view more pics of this one here. I don't plan on running this guy until I get the rest of my bike squads assembled and painted, but I was in the mood to do this one after I updated the Librarian. Might as well do all the HQ's, Elites, and work my way down from there.

While I was waiting for paint to dry on the Chaplain, I was able to start on the next dreadnought, this one equipped with Plasma Cannon and Dreadnought Close Combat Weapon w/ storm bolter.


I love this model; it's one of the old metal dreadnoughts and sure has been through a lot in the last 10+ years I've had it in my army. I positioned the legs and torso in a way to make it look as though the mechanized walker was taking a step or in motion. I converted the plasma cannon arm from a devastator blister pack -- back then the dreadnought box set only came with an assault cannon, so there was some metal hacking to be done. I'll have more on this model soon.


NOVA Open

Thursday, January 27, 2011


Today, I registered for my first Grand Tournament, the NOVA Open. My wife will be joining me and I've promised her an Otakon 2.0 experience minus the fire drill, or at least I hope. It should be a good time. The tournament takes place at the end of August, so I should have plenty of time to finish painting the rest of my primary Raven Guard army. I'd really like to have my Dark Eldar force well on its way to being fully painted by that time too, but there's still a lot of work to be done between now and then. I'm definitely looking forward to playing some more games. I just hope having the whole army painted gives me some better dice rolls!

Raven Guard Dreadnought

Monday, January 24, 2011


I finally finished this shooty Raven Guard Dreadnought, equipped with twin-linked lascannon & missile launcher. This one took a little longer, admittedly, because I broke my own rule of not sticking to one unit at a time. I was distracted by some upcoming projects while I was deciding how to do the dreadnought base.


I started prepping the next 3 dreadnoughts and tried to master the art of dotting eyes on the models with exposed faces/skin. I have a couple more techniques to try out but I hope to yield better results in the near future with a little more practice. One of these "flesh" models is an old Space Marine Chaplain on Bike (far left) that I've started to repaint to match the Raven Guard color scheme. I should have some more on this guy posted soon.

Back to the dreadnought, I knew I wanted to incorporate some stones, ruble, maybe a missile or loose ammo casings, etc. on the base to give a more dynamic feel to the model -- this dreadnought was built from the body of the one included in the Assault on Black Reach (AoBR) 40k box set with the lascannon arm coming from a Venerable dreadnought sprue, and the missile launcher arm which was scratch built from spare Land Speeder Typhoon and hunter-killer missile bits.


I wanted to outfit at least one of my dreadnoughts for long-range armour busting & fire support since the other 5 dreadnoughts in my army are equipped for other tactical and strategic scenarios.

 
Since this dude will probably be hugging cover on the board to avoid being blown up on turn 1, I wanted to highlight the potential nearby foliage / terrain with some green grass on the dread's base. I picked up a canister of Citadel's Scorched Grass at the same time I bought the Dead Grass for the bases with the intent of putting this on my Scouts, snipers, and other models that are more likely to be in cover during the game. This also introduces some more color into the palette and adds variety to bases of the models in the army.


I used some resin material and bits from a basing kit with dead grass on the front portion of the base and green / scorched grass on the back half.


Overall, I'm really happy with how this one turned out. Looking forward to having the rest of the dreadnoughts painted up and on the tabletop soon. You can view more of the most recent dreadnought shots here, and all of the shots taken earlier during the painting process here.

Cheers!


Take a Picture

Sunday, January 16, 2011

Something that has really helped the painting process while blogging has been photographing the miniatures after I think I've "completed" a step. This has helped point out numerous details I wanted to change or keep in balance, as well as several mistakes I might not have noticed such as this spot of green stuff helping to hold the rocks on the base together (lower right):


I've since gone back over to patch the spot with some more sand/gravel.


I added a bit more to the rest of the base to fill it in some more. I'd still like to go back and highlight the armour, maybe attach a banner, then try my hand at free-handing the Raven Guard symbol .

I'm also making some progress on this guy:

Librarian Re-basing

Wednesday, January 12, 2011

I finally finished re-basing the Terminator Librarian. Here's a quick shot I took with my phone:


When I get some better lighting I'll post some more pictures here. Getting closer to calling it a wrap on this one. Since I've been working on all these terminators lately, I decided I should go ahead and finish the remaining 5 terminators I have from an Assault on Black Reach (AoBR) box (also have Space Hulk models to do at some point). This works out perfectly since I recently inherited (thanks Matt!) plastic sprues of 5x twin lightning claws and 5x thunder hammers + storm shields. I also recently came across this amazing model over at ForgeWorld:


I really want to order one of these around my birthday. If I do, I'm thinking I might build a special backing unit, with models also equipped with a thunder hammer + storm shield. Captain Shrike can join his Wing, who also wield mighty lightning claws; so why shouldn't Captain Korvydae get similar treatment? If I put the thunder hammer + storm shields on vanguard models w/ jump packs that leaves the sets of lightning claws to go on the remaining terminators. This should make for some fun projects ahead!

Terminator Librarian

Friday, January 7, 2011


I was able to get more work done on this Terminator Librarian that I started to re-paint (again) the other day. There's some more details to go over, but this model is becoming more and more difficult as I go over the small details -- this is one of my oldest models and has seen a few paint schemes, so it has lost some of that detail due to the amount of paint on the model (I wasn't very good at stripping paint off when I was younger). You'll also notice the older, smaller base from before models equipped in terminator armour were required to go on the larger bases:


I'll hopefully have this guy re-based this weekend. Still deciding exactly how I want to do it -- in general, this model feels smaller in stature compared to the newer, slightly larger plastic terminator models. Aside from the flagpole, not much is helping this HQ choice stand out amongst his fellow tactical dreadnought armour-clad brethren. I'm going to try to make the model seem a bit larger; we'll see how it goes!

Here's some more close up shots till next time...


WIP - Shooty Dreadnought

Thursday, January 6, 2011

 
I'm a little more than halfway finished with the first dreadnought. The subsequent dreads will go a little quicker and I should have some time this coming weekend to work on them. I'll continue to update the galleries with pictures as I make progress and try to capture the steps taken during the painting process.

Here's a few of the most recent shots:


Raven Guard Terminators

Saturday, January 1, 2011


Great success! After locking down the design for the bases on the Terminator Sergeant, the remaining 9 models were based in under an hour. This is the same approach I took when I sat down to paint. Start by selecting one model from the squad you want to complete and use this model as a prototype for trying out various painting/design schemes until you’ve locked one down. Once you have the ‘example’ model looking good, go right down the line, repeating each step with the remaining models in the squad before moving onto the next step. I know this sounds straightforward and simple but it works. And honestly, if I don’t make a concerted effort to paint in this manner, I get distracted easily and want to work on something else. This approach will save you time because you’ll have the same paint/materials ready to go for the same step on each model; you’re already familiar with performing the same actions for that step, so repeating the step should make you faster and more accurate; lastly, it takes the guess work out of what to work on when you do get some time to work on your hobby -- otherwise I’ll stare at my collection and be distracted by the “cooler” looking models or be completely daunted by all the remaining painting/assembly that stands in the way of me having a fully painted army on the tabletop. If animals/small children allow, having a designated area for this is ideal so you don’t have to pack everything away and set it all back up again to paint. This was key for me as I rarely get a long stretch of time to sit and work on painting. Instead, I can sit down whenever I get a few minutes of down time and jump right into the step I was working on.

This was my prototype for the squad (you can see from the background model the first step of my assembly-line process: a layer of *foundation paint, astronomican grey, over all parts that will end up white or with a lighter color):


*Before I heard about warhammer, I was into building model airplanes and painted them using Testor's paints, which I also used on my very first models (this paint needed thinner and can clump out the detail more than lighter, water based paints). Eventually, when I could afford them, I started buying some of Games Workshop's recommended line for painting miniatures. Citadel's Foundation paints are some of the best I've used and will save you a good deal of time during the painting process as the pigmentation of the color seems much richer/thicker which cuts down on the number of coats necessary to achieve the desired color.

After the grey foundation paint was dry I went back over those parts with skull white, followed by the blood red on the shield and eyes:


Next came boltgun metal for the gun, powerfist, and various metallic parts on the model followed by bronze for the ammunition:


Once I had the primary colors on each of the models, all that was left was the bases and fine detail work:


I decided to use Khemri Brown foundation paint with some of Citadel’s dead grass for the bases:


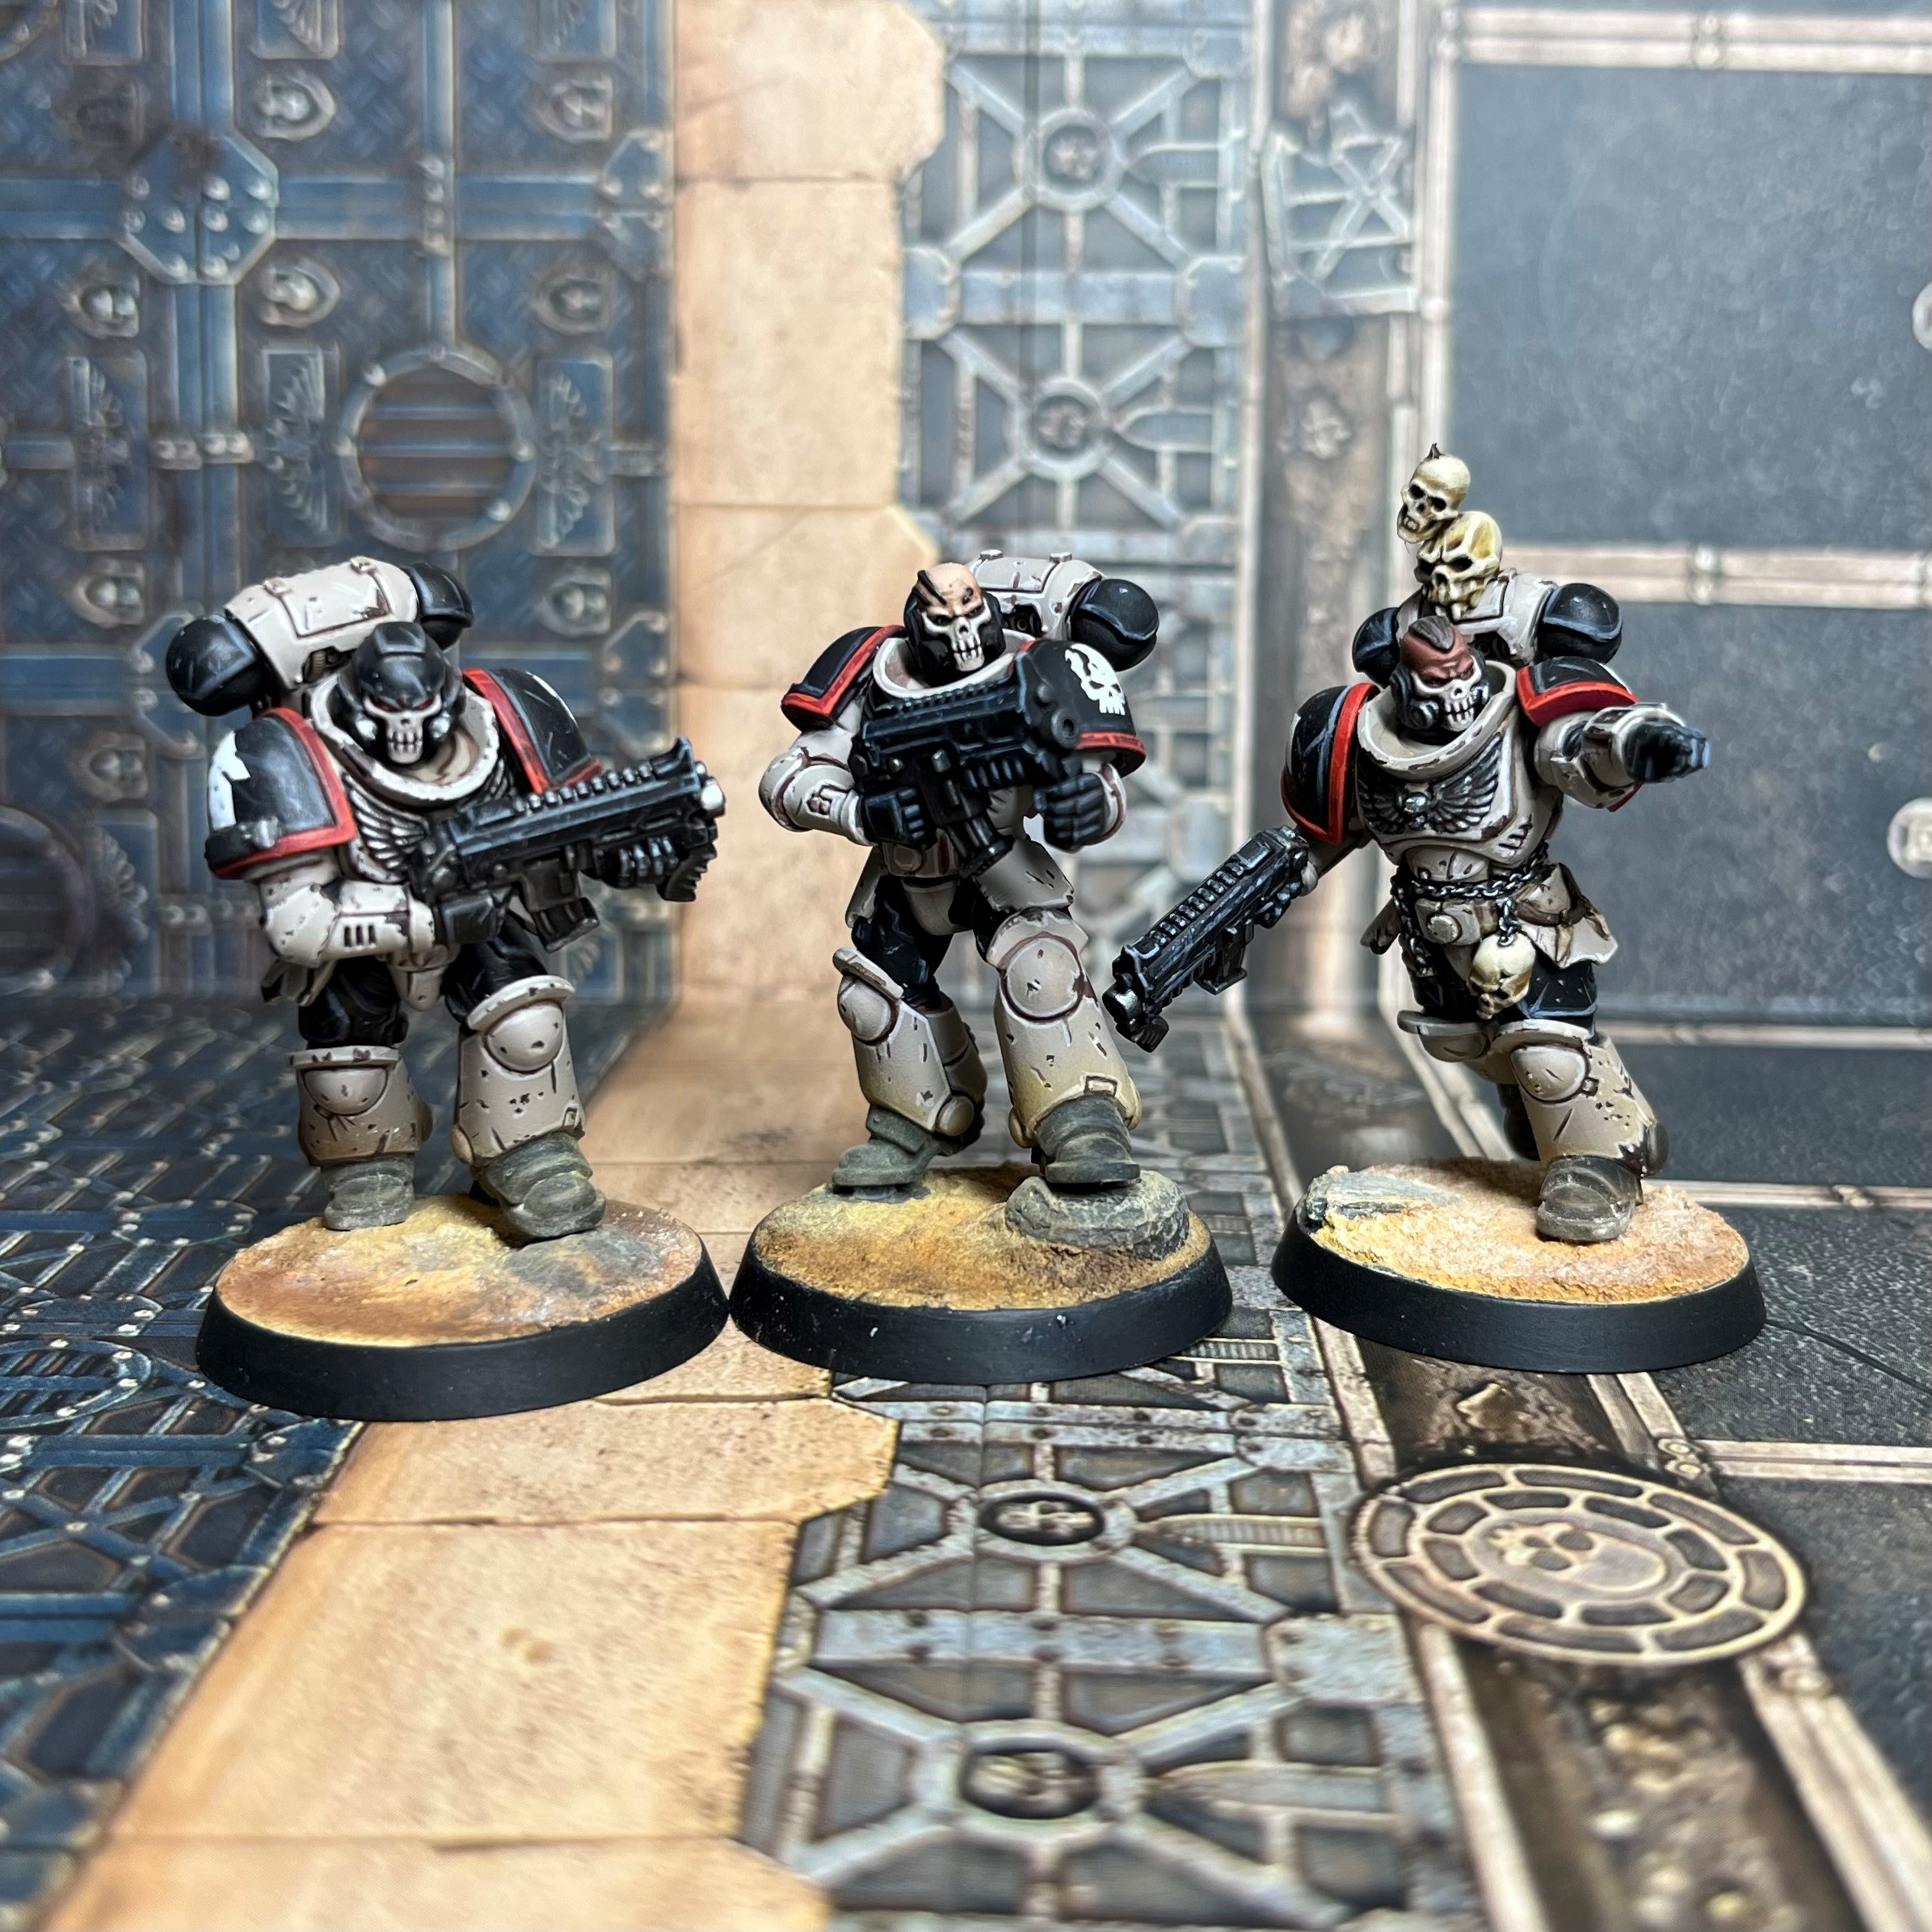
Once I had the bases complete, I went back over for a quick touch up to correct any glaring mistakes. I still have more detail work I can do to make the models even better, such as purity seals, more highlights on the armor, etc. But I’m pretty happy with the state of this first squad - you can view more pictures here. I may go back at a later time once my skills are a bit more honed.


This is the first full squad I’ve managed to fully paint in quite some time. I was pretty rusty with the brush but the concepts/techniques came back fairly quickly. Looking back over the last few weeks I’ve been working on this squad, the two biggest things that helped me “complete” them was a) having the right materials; and b) taking an assembly-line approach to painting. With this squad finished, I can now check off my first feature project goal for this blog as well as first completed squad of 2011!


Here’s hoping 2011 is a good year for all!